
Settings Screen – Custom Card
Kustomisasi settings screen dengan custom card
Panduan Settings Screen – Custom Card
Bagian ini melanjutkan konfigurasi Settings, fokus pada menambahkan Custom Card yang bisa menavigasi user ke menu / screen tertentu.
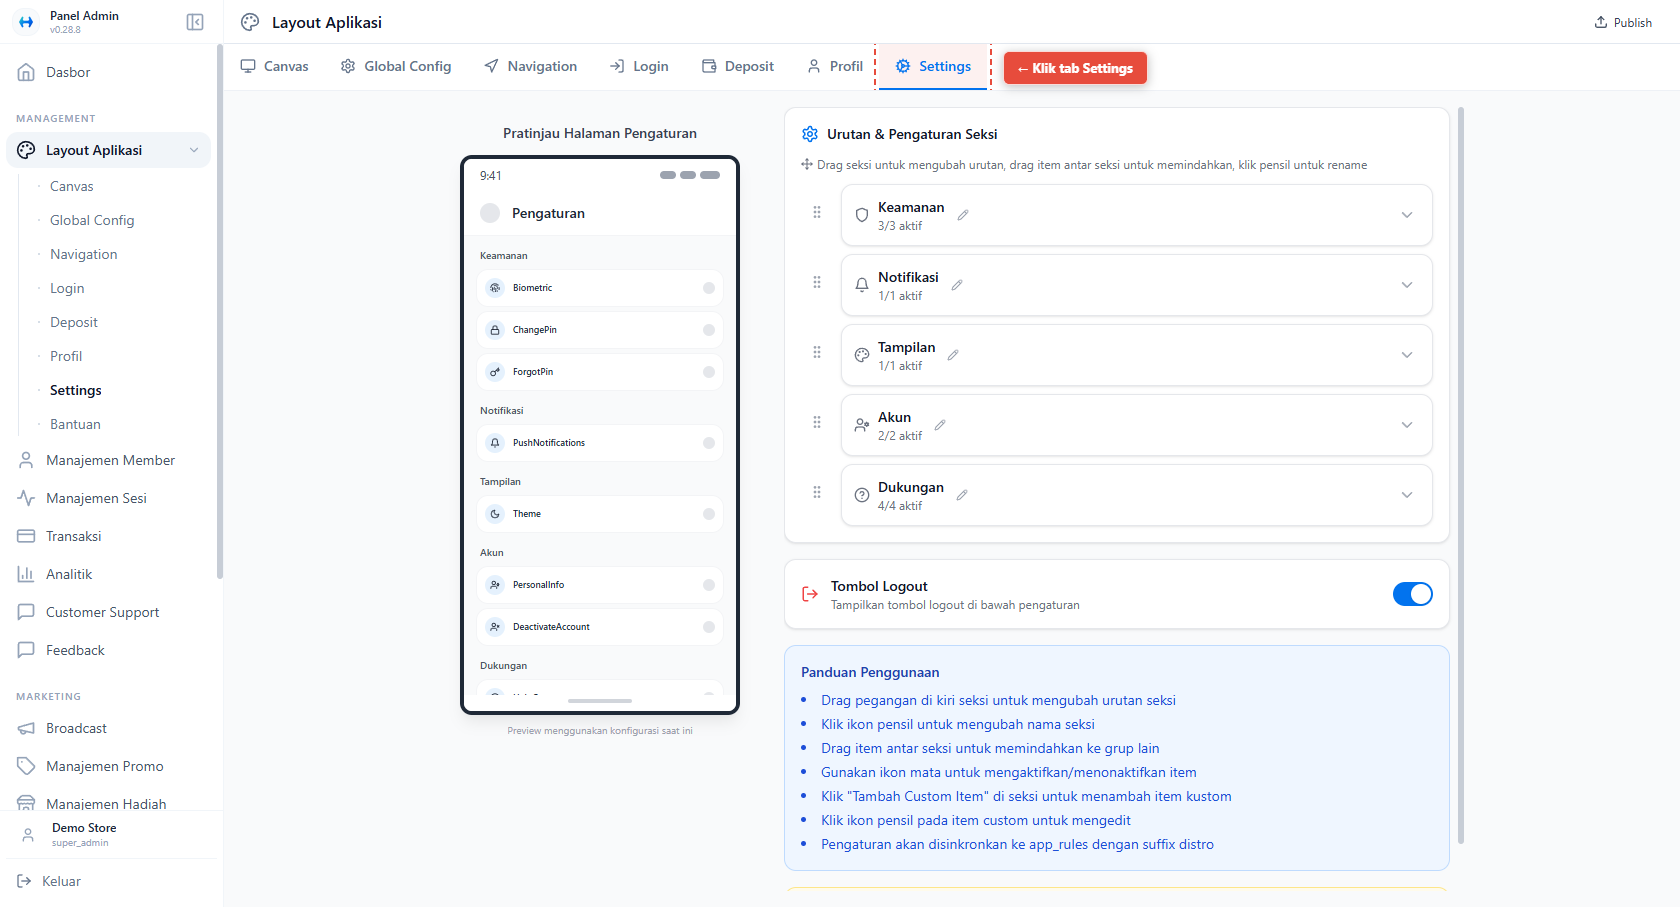
A. Menambahkan Custom Card
- Panel Admin → App Layout
- Masuk tab Settings
- Pilih section (contoh: Security)
- Klik + Tambah Custom Item
Akan muncul modal Edit Custom Setting.
B. Field di Custom Setting
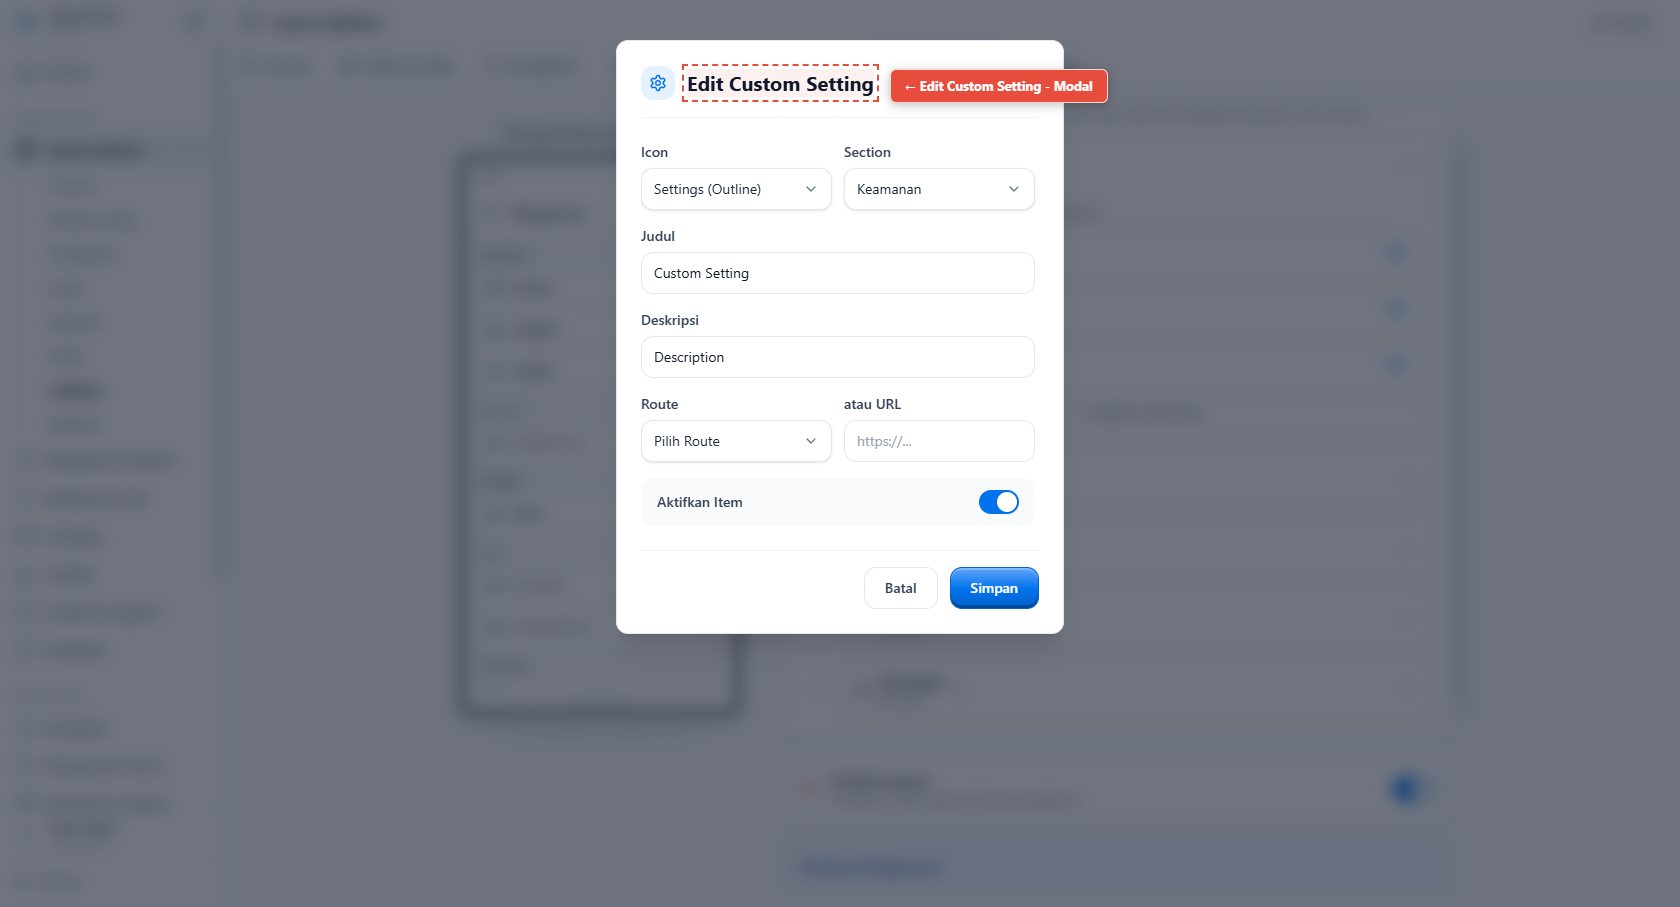
1. Icon
- Pilih ikon dari sistem (outline / filled)
- Ikon tampil di kiri card
Contoh:
Settings (Outline)ShieldInfo
2. Section
-
Menentukan section tempat card muncul
-
Contoh:
- Security
- Notifikasi
- Akun
- Tampilan
Card akan otomatis masuk ke section ini.
3. Judul
-
Judul utama card
-
Contoh:
Custom Setting
4. Deskripsi
- Teks kecil di bawah judul
- Opsional, tapi direkomendasikan untuk kejelasan UX
Contoh:
Description
5. Route atau URL (Navigasi)
Custom card harus punya tujuan. Ada dua opsi:
a. Route
-
Pilih route internal
-
Membuka screen baru (stack baru)
-
Cocok untuk:
- Produk
- Riwayat
- Halaman internal lain
b. URL
-
Masukkan URL (WebView / eksternal)
-
Cocok untuk:
- Help Center
- FAQ
- CMS page
Route dan URL bersifat mutually exclusive. Isi salah satu.
6. Enable Item
-
Toggle Enable Item
-
Jika nonaktif:
- Card tidak tampil
- Konfigurasinya tetap tersimpan
C. Simpan & Atur Urutan
- Klik Simpan
- Card muncul di section yang dipilih
- Gunakan drag & drop untuk mengatur urutan
- Bisa dipindahkan ke section lain dengan drag antar section